How to submit artwork & prepare your files
Submitting artwork for most items requires no bleed.
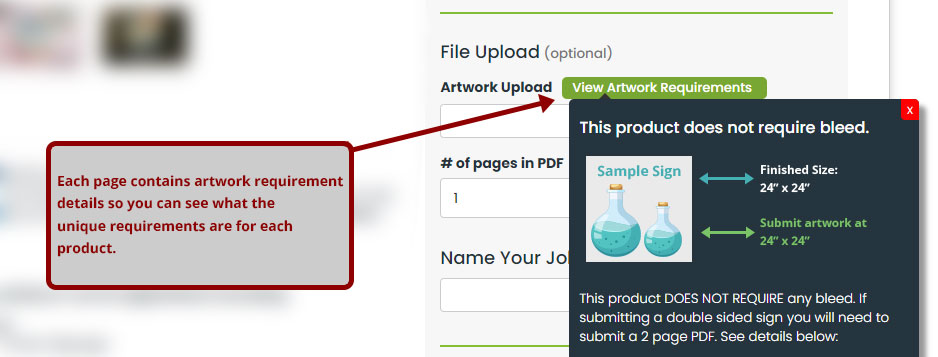
We've made artwork submission as easy as possible. For most of our signage products you do not need to add any bleed. To be sure, view the tooltip under Artwork Requirements on the product page - it gives you specific details for that product and what's required.
For example, here's the artwork requirements panel for coroplast signs:
Submitting double-sided signs?
If you're submitting artwork for a double-sided sign, you'll need to submit a 2-page PDF file. Page 1 is always treated as the front, and Page 2 is always treated as the back.
Even if the artwork is going to be identical on both sides, you still need to submit a PDF that contains the same artwork on both Page 1 and Page 2.
If you want the back of your sign to show different artwork, just make sure Page 1 and Page 2 are different.
Submitting signs with different artwork pieces?
You can easily upload artwork even when you have more than one version that needs to be printed. For example, say you want to print 4 different artwork versions of a single-sided coroplast sign. The only requirement is that all the sizes match.
If you're submitting artwork for a sign that's 24" × 24" and you want to print 4 unique artwork versions, you'd select the following when ordering:
- Size: 24" × 24"
- Printed sides: Single Sided
- Artwork upload: a single 4-page PDF, with each page containing unique artwork
- # of pages in PDF: 4 - this is important. Tell our shop there are 4 pages in your PDF so we can proof and pre-flight it correctly. If you leave this at 1, our automation won't know you're submitting 4 unique pieces of artwork.
Here's an example of what that order would look like:

Submitting signs with custom shapes
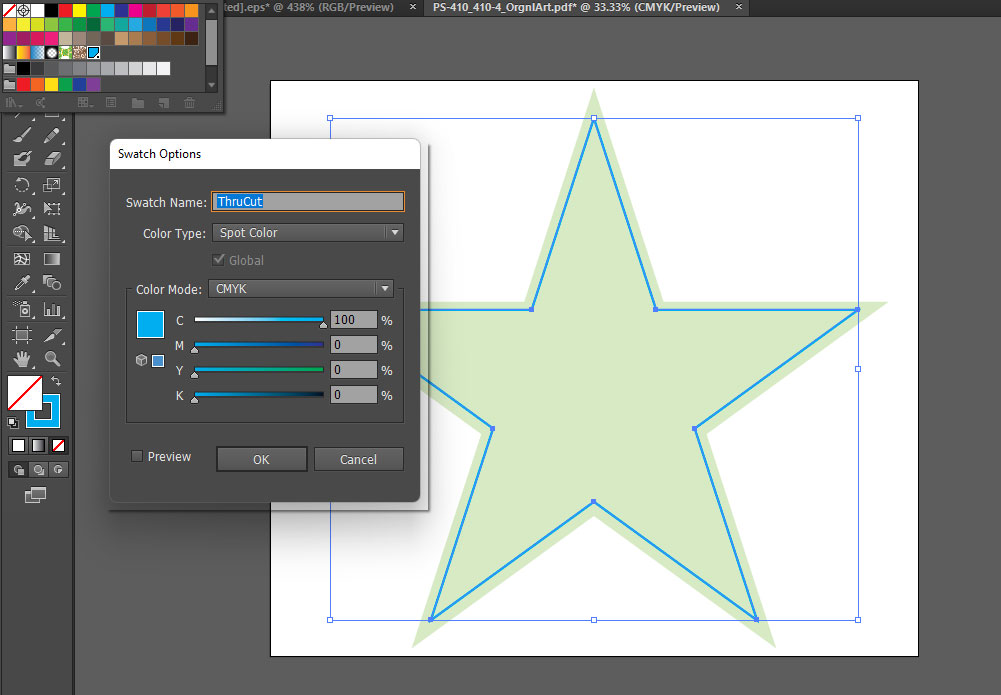
If you want your sign cut to a custom shape - anything other than our standard square or rounded corner - we provide an easy way to do that. When placing your order, choose Custom Shape under the Corners or Custom Shape dropdown. This tells our system to look for a spot color in your artwork that defines the cut path.
You can create nearly any shape you like. In your design app:
- Create a spot color named exactly
ThruCut- our pre-flight looks for this name. - We recommend using 100% Cyan as the visible swatch.
- Add roughly 1/8" (3 mm) of bleed outside the cut line so the print extends past the cut and our CNC routers can trim cleanly to your final size.
Here's an example in Adobe Illustrator showing how the file is set up - note the bleed bleeding past the spot color: